How-to
Aug 28, 2024
Real Estate Photography: Tips for Realtors
A stunning photograph can be the difference between a quick sale and a property that lingers on the market. As the old saying goes, "a picture is worth a thousand words" - but in real estate, it could be worth thousands of dollars. Ready to transform your listings from overlooked to irresistible? Let's get started!
The power of first impressions
Imagine a potential buyer scrolling through property listings, their finger hovering over the screen. What makes them stop, look closer, and ultimately schedule a viewing? More often than not, it's a photograph that captures the essence of a home - one that helps them see their life within those walls. That's the power of great real estate photography.
But here's the million-dollar question: are your photos working as hard as you are to sell properties?
Choosing the right photography equipment
You might be thinking, "do I really need expensive gear to take great photos?" The answer might surprise you! (Spoiler - you don’t!)
While professional equipment can improve your real estate photography, you can still get great results with less high-tech options. Whether you're using a DSLR, mirrorless camera, or a smartphone, here's what you need to know.
For DSLR or mirrorless camera users:
Invest in a wide-angle lens (16-35 mm) for capturing spacious interiors.
A sturdy tripod is essential for sharp images, especially in low-light conditions.
Don't forget accessories like a remote shutter release and lens filters.
Smartphone users, fear not! Modern smartphones are capable of producing high-quality real estate photos. Consider these tips:
Use the latest smartphone model available to you, as camera technology improves with each generation.
Invest in clip-on lenses for your smartphone to achieve wide-angle shots.
Use a smartphone tripod or stabilizer for steady shots and a Bluetooth remote shutter to avoid camera shake.

Photo: A realtor taking a picture of a well-lit and framed kitchen using a smartphone.
Mastering the art of lighting
Ever wondered why some rooms in photos look inviting while others feel flat and lifeless? The secret lies in the lighting.
Natural light: Schedule shoots during the day, ideally when the sun is at a 45-degree angle to the property (typically mid-morning or mid-afternoon). Avoid shooting at noon to prevent harsh shadows.
Artificial light: Turn on all interior lights to create a warm, lived-in atmosphere. Replace any burnt-out bulbs and make sure all fixtures have bulbs of the same color temperature.
Balancing light: Learn to balance natural and artificial light for a natural, inviting look. Use your camera's white balance settings or adjust in post-processing for accurate colors.
Smartphone tip
Use HDR mode for high-contrast scenes to capture more detail in highlights and shadows. Experiment with your phone's "night mode" for low-light situations.
Preparing the property for success
You've mastered lighting and composition, but the home still looks cluttered and uninspiring in photos. What went wrong?
A well-prepared property can significantly reduce your post-processing work and create more appealing rooms. Here's a quick checklist:
Interior: Declutter every room, open all curtains and blinds, and turn on all lights.
Kitchen: Clear countertops and remove magnets from the refrigerator.
Bedrooms: Make beds with crisp, neutral linens.
Bathrooms: Remove personal care items and hang fresh, coordinating towels.
Exterior: Mow the lawn, remove vehicles from the driveway, and add some colorful potted plants near the entrance.
Before starting your shoot, do a quick walkthrough with your camera or phone. Take test shots to identify any issues that need addressing. This can save time and prevent the need for reshoots.
Composition and framing, one room at a time
Ever noticed how some real estate photos seem perfectly balanced, while others look off or uninviting? The secret is in the composition.
Rule of thirds
Divide your frame into a 3x3 grid (most cameras and smartphones have this as an overlay option). Place key elements along these lines or at their intersections for a more balanced and interesting image.
Leading lines
Use natural lines in the architecture to guide the viewer's eye through the image. This could be hallways, countertops, or even patterns in flooring.
Multiple angles
Provide a complete view of the listing by capturing a variety of angles.
Interior: Shoot from corners to maximize the sense of space. Take photos from multiple heights - eye level, waist level, and overhead if possible.
Kitchen: Showcase the layout and workflow, including close-ups of high-end appliances and fixtures.
Bedrooms: Photograph the bed, any seating areas, and views from windows if they're a selling point.
Bathrooms: Use mirrors creatively to make spaces appear larger and highlight luxury features.
Exteriors: Capture the front of the house from several angles, including landscaping and outdoor living spaces.

Photo: A photographer capturing the exterior of a home using a tripod and camera.
Framing
Use doorways, windows, or architectural features to frame your shots. This adds depth and draws attention to specific areas of the property.
Smartphone tip
Use grid lines on your phone's camera app to help with the rule of thirds. Many smartphones now offer an "ultrawide" lens option - use this for small spaces, but be aware of potential distortion.
Don’t forget post-processing
Even the best photographers edit their photos after the shoot. This step, called post-processing, can turn good photos into great ones. Don't worry if you're new to this – we'll break it down into simple steps:
Fine-tune the lights and darks (exposure, contrast, highlights, shadows)
Exposure: This makes the whole photo brighter or darker. If your photo looks too dark overall, increase the exposure. If it's too bright, decrease it. Aim for a balanced look where you can see details in both bright and dark areas.
Contrast: This makes the difference between light and dark areas more pronounced. A little contrast can make your image pop, but too much can look unnatural.
Highlights: These are the brightest parts of your image. Lowering highlights can help show more detail in very bright areas, like sunlit windows.
Shadows: These are the darkest parts. Lifting shadows can reveal more detail in dark corners of a room.
Correct the color temperature (white balance)
Sometimes photos can look too orange (warm) or too blue (cool). Adjusting the white balance helps make the colors look natural, like they did in real life. Look for white objects in your photo (like walls or trim) – they should appear truly white, not yellowish or bluish.
Enhance specific areas (local adjustments)
Most editing software allows you to adjust certain parts of the photo without affecting the rest. For example, you might brighten up a dark corner or enhance the view out of a window. This is like using a brush to "paint" adjustments exactly where you want them.
Straighten and crop
Use the straighten tool to make sure your vertical lines (like walls and door frames) are perfectly upright. Crop your image if needed to improve composition or remove distracting elements at the edges.
Develop a consistent style
Try to edit all your photos for a listing in a similar way. This could mean using similar brightness levels, color temperatures, or overall looks. Consistency helps create a cohesive, professional appearance for your listing.
Try virtual staging
Virtual staging allows you to show potential buyers multiple styling options for the same space, all without moving a single piece of furniture. Here's how to do it effectively:
Choose photos that showcase the space well, using the photography tips we've discussed.
Consider the style preferences of potential buyers for the property.
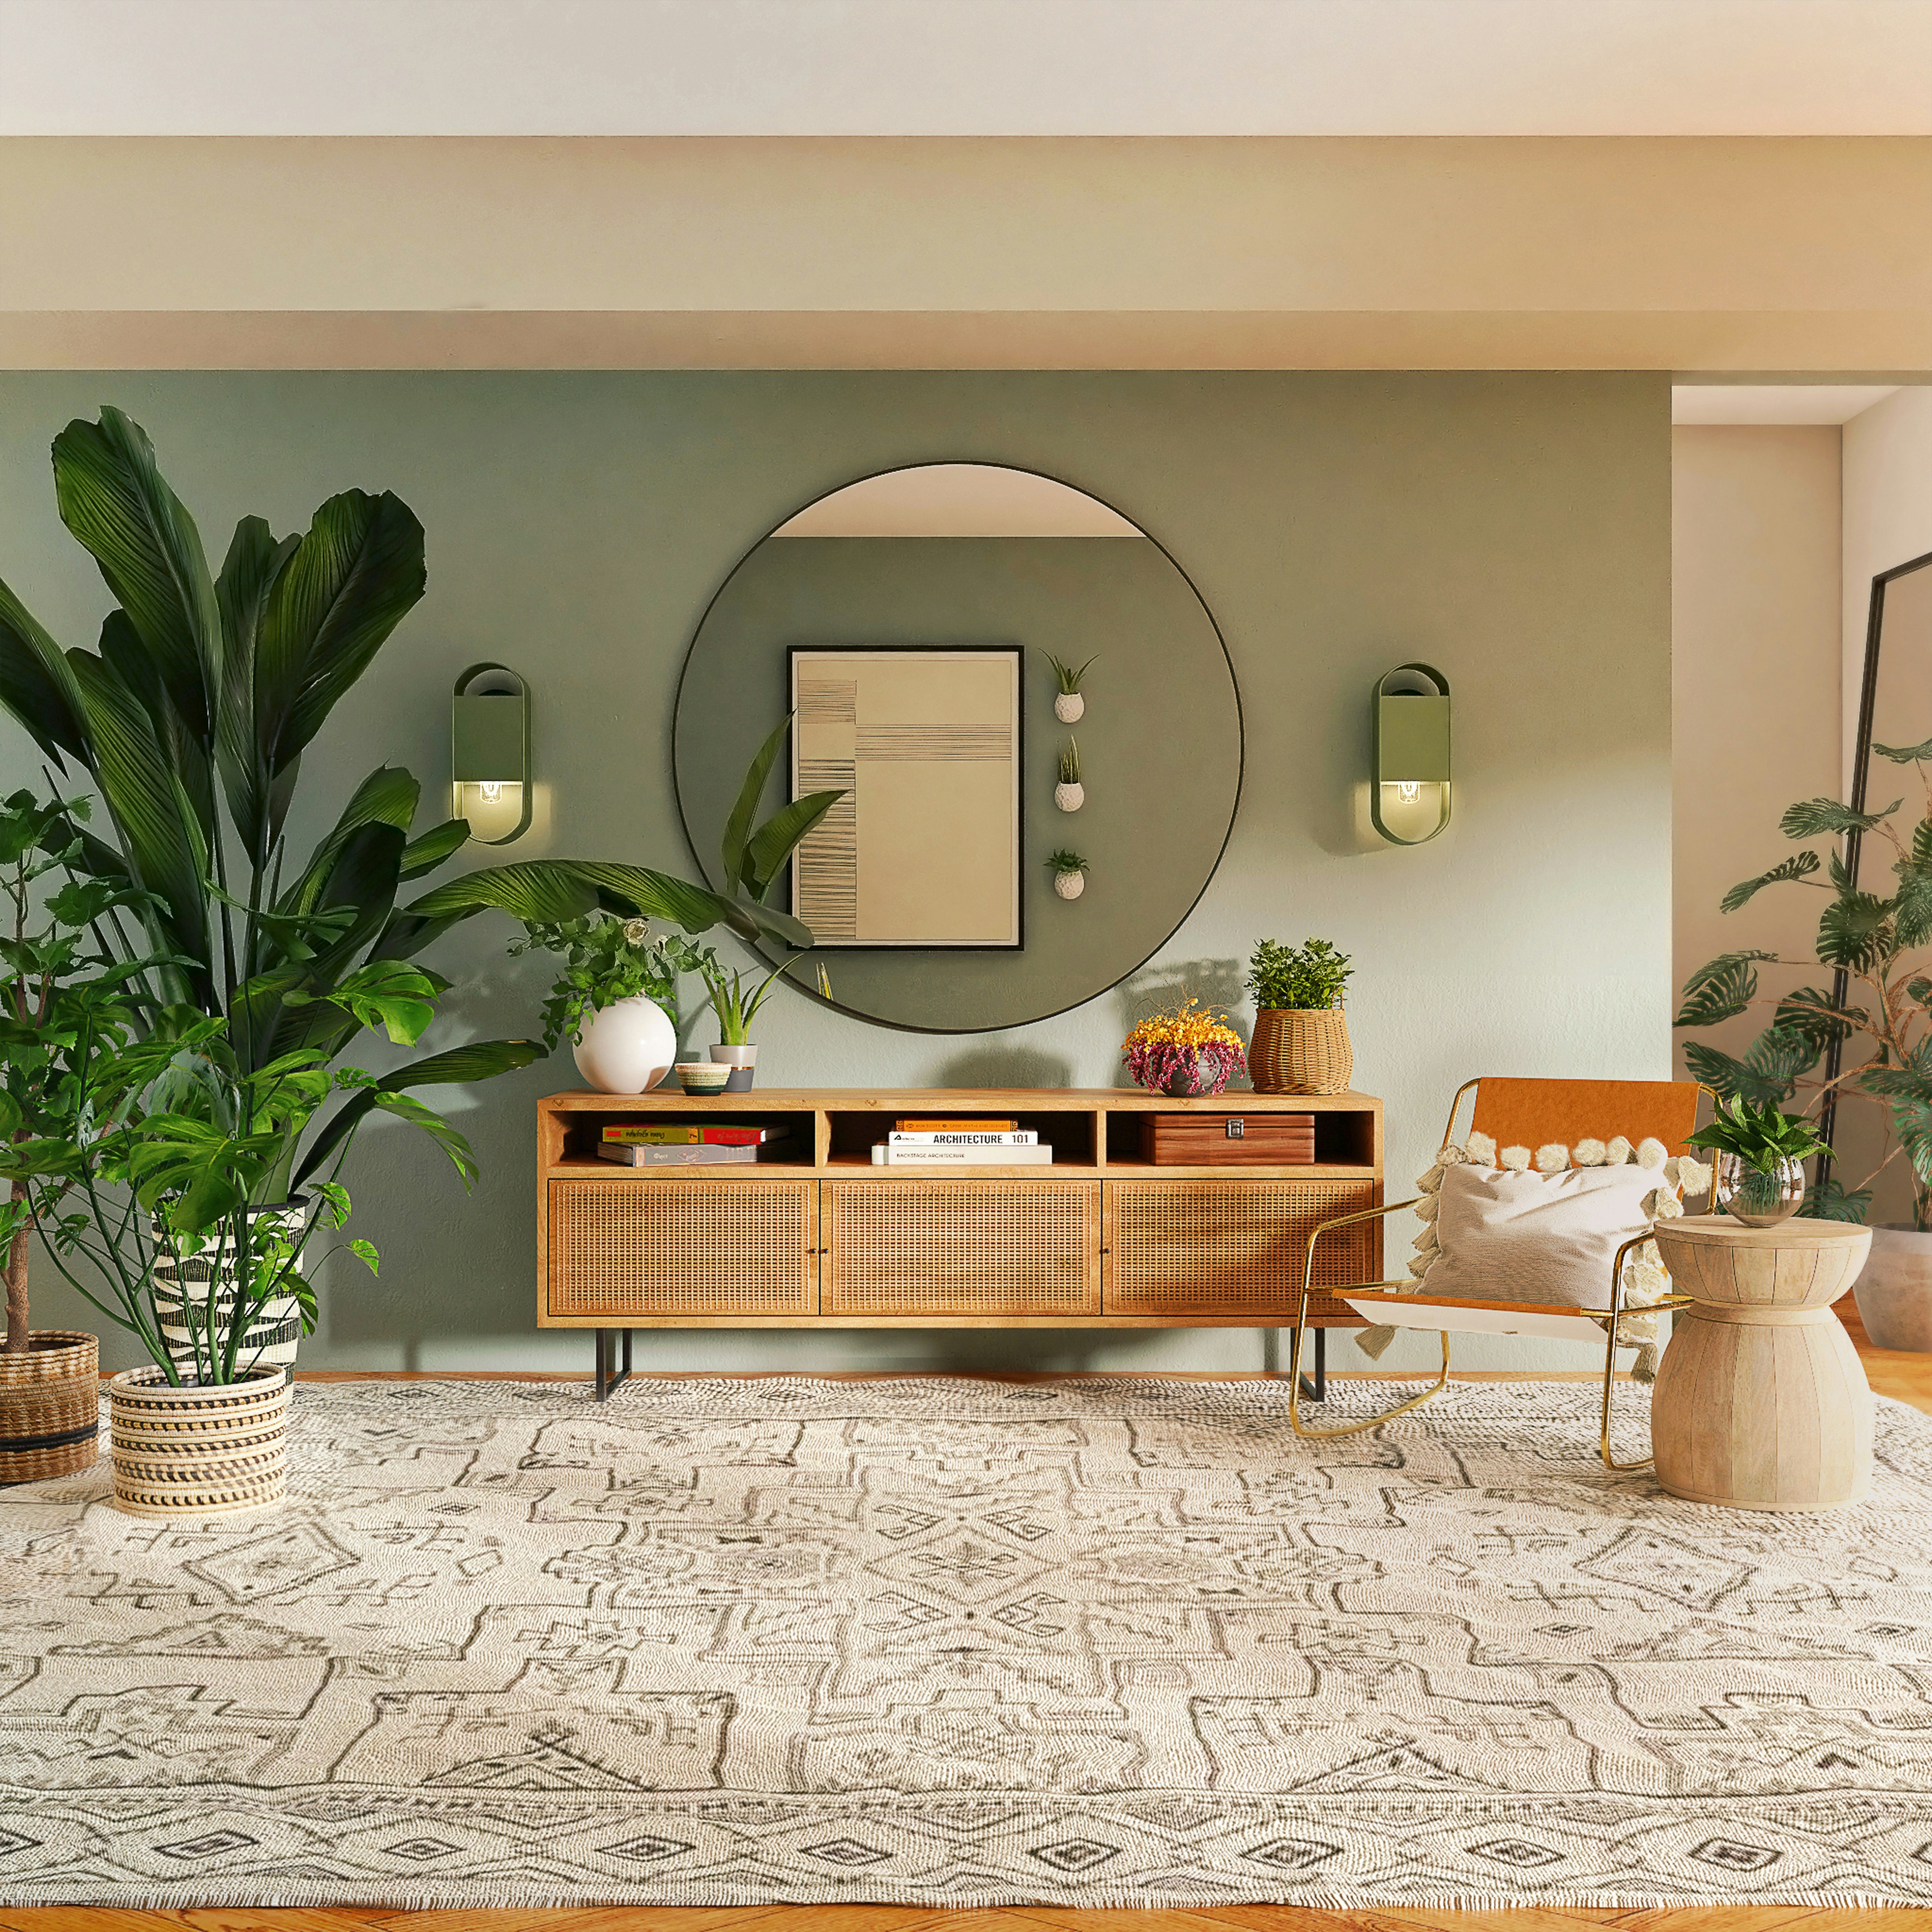
Use virtual staging tools like Palazzo to add furniture and decor that shows multiple uses and designs for a space. For example, stage a room as both an industrial home office and a coastal guest bedroom.

Photo: A bedroom virtually staged in a mid-century modern style using Palazzo.
Smartphone tip
Many smartphones have built-in editing tools that cover these basics. There are also user-friendly tools like Palazzo available that can help you achieve great results without a steep learning curve.
Don't be afraid to experiment – with digital editing, you can always undo your changes if you don't like the result. The more you practice, the better you'll become at knowing just what adjustments your photos need to shine!
Make a statement with your property photos
Great real estate photography is more than just pointing and shooting! Remember, every room, every angle, every play of light and shadow is an opportunity to showcase what makes a house special. And with Palazzo's virtual staging capabilities, you have the power to take those great photos and transform them into personalized spaces that allow potential buyers to envision their future in that home.
So, what's your next step? Try putting these tips into practice! Start with a room in your own home, or offer to photograph a friend's house. Experiment with different techniques, analyze your results, and keep refining your skills.